Showing posts with label DIY. Show all posts

April 19, 2015

Spring Vibes


top: Land's End (similar), jeans: Pink Blush Maternity c/o, flats: Target (DIY similar here), bag: Amazon, watch: Kate Spade

Hope your weekend was as nice as mine! I finally got to decorate my living room and dining room, arrange the gallery wall and do tons of spray painting. When in doubt, I spray paint stuff. It's the best thing in the world for those old things that need to be updated, like vases, lamps and frames. I can't wait to show you what our home looks like now. 

In other new, Lilly Pulitzer for Target was a fiasco fashionistas won't forget for a long time. I didn't think we would have that many shoppers in our small town store. Wrong! I got there @8:05 and everything was gone. I mean, everything! Many women stood outside of the dressing room waiting for the stuff others didn't want. In the end, my patience and stalking others with unwanted items paid off and I came home with a few things. There are a lot of angry Lilly fans out there because of the (super) limited availability of the collection and those trying to sell their hauls for three times the price on eBay. After checking Instagram and different hash tags I can see why people are upset about 'limited time' - which in this case means limited few hours. I can't wait to style my Lilly pieces on the blog soon! 

Gap, Old Navy and Banana Republic are having their 40% OFF SALE (ends 4/21)! 

Shop The Post


April 9, 2015

Tassel d'Orsay Flats {DIY}


When I saw these tassel flats in J.Crew catalog, I was totally on board with the new trend. I love how they add a simple and cute touch to the shoes, but I couldn't justify the price tag. When a similar pair showed up at my local Target, (on sale!!!) I bought them. So to make up for the lack of tassels I decided to make this a quick DIY project (which is really not a project at all). 
It's ridiculously easy!


Step 1: Prepare your materials, i.e. take the shoes out of the box

Step 2: Warm up the glue gun 

Step 3: Place small amount of hot glue in the middle of the front of the shoe and hold the tassels in place until they are set. Repeat the same thing with the other shoe.

Step 4: Enjoy the fruits for your (short) labor


Shop d'Orsay Flats


March 26, 2015

All Pink


top: Lord & Taylor (similar here and here), jeans: Nordstrom, heels: Target (on sale!),  clutch: DIY Tutorial, watch: Fossil, sunnies: Kate Spade
Hope you had a great week! We are finally out of the woods and no one is sick anymore. Getting lots of things done, painting and decorating our new living room and dining room. Can't wait to show you guys the final results (hopefully that will happen in my lifetime haha)! 

Shop The Post

March 17, 2015

Leopard Clutch DIY


Leopard has been a trend that took me a while to embrace and wear. I still have very few things that are leopard print, partially because my hubby sort of hates it. I've been seeing this clutch everywhere and couldn't stop wishing for one. But as I said in yesterday's post, it's way out of my budget so I resorted to simple DIY project to fix this problem. Here is a step by step process for your one of a kind, but sort of like Claire V. looking clutch. 

YOU WILL NEED:
- clutch./old cosmetics case
- J.Crew catalog (or any kind of paper to lay your glue gun on)


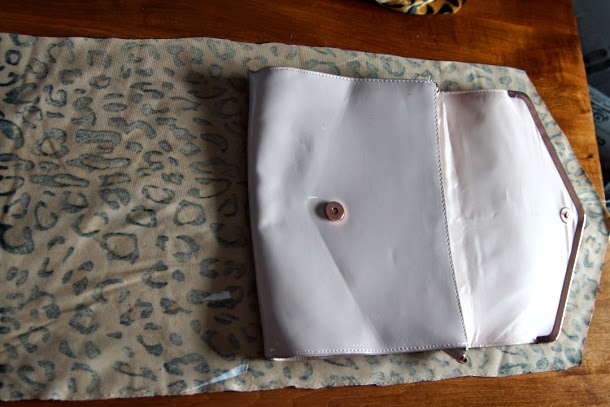
Step One: Lay out your clutch and measure how much fabric you are going to need. Cut the sides and length allow for 2 inches seam (and of course for human error). Always cut more for the sides (4 inches) that way you can just cut off the extras.


Step Two: apply the hot glue and press it into the clutch. Be careful with fingers and make sure not to add too much glue so it doesn't look messy.


Step Three; Glue the fabric to the back, applying glue to 3-4 inches at a time, then pressing the fabric so it sets. Wait for it to cool and continue on with the rest.


This is not is looks now.


Step Four: Apply hot glue and press the sides in. Make sure not to have to much fabric, so measure it first and cut anything unnecessary.


Step Five: Hot glue the front and fold it over. Cut the whole for your magnet zip with a sharp knife. Apply a little glue all around it and press to seal. Don't worry if it doesn't come out perfect, it will be covered with the envelope top. 
And done!


Style your clutch for months and years to come, while people ask you where you got such a pretty piece of accessory. Make sure to PIN any of the image from today's post for later reference. 


For This Project You Will Need


Black X2


top: LOFT, leggings: Gap (similar), scarf: Amazon, clutch: DIY (similar),  
pumps: Jessica Simpson
Have you seen this clutch over all over the fashion blogs? Well, it's been around for a while and its popularity doesn't seem to be slowing down. Of course, pony hair and the brand name are tempting but the price tag is not easy to swallow. I've been dreaming about it for a while and decided to make my own. I've taken an old clutch and wrapped it in calf hair-like material in under $10. It was super easy and looks great, don't you think? A tutorial is coming soon but in the mean time here are some other options on a budget (or not).

Thank you for stopping by!
xo, Anna

February 26, 2015

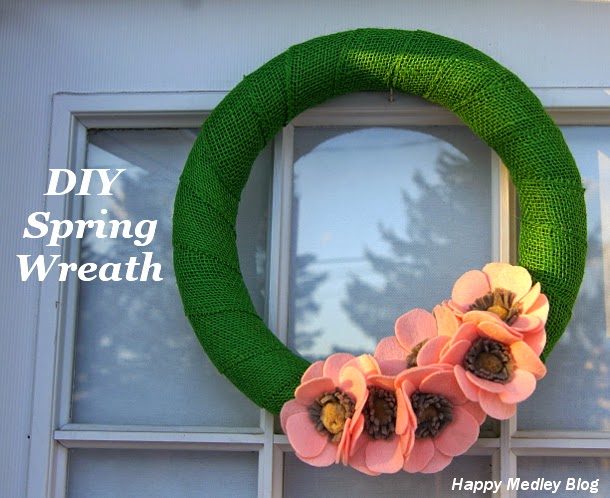
Felt Anemone Spring Wreath {DIY}


I know that many of you still have snow mile high around them but I'm so excited for spring. Officially I'm getting in spring mood after March 1st and don't care how much it snows after that. So the first step to driving winter temperatures away is dressing up your front door - maybe winter will get the idea and get the heck outta here! But seriously, I couldn't wait to get started.


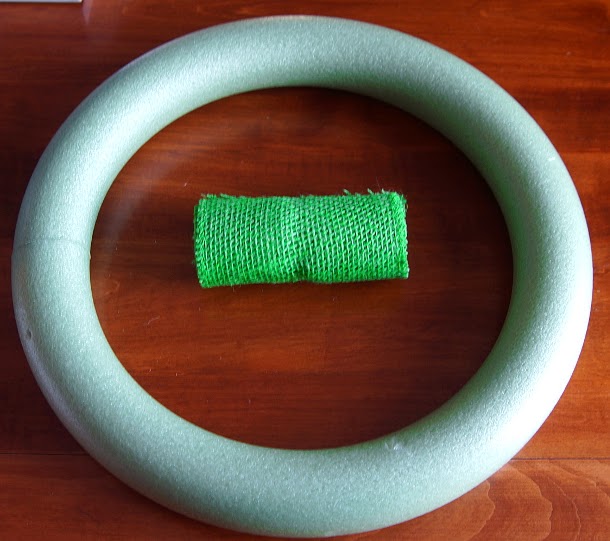
For the wreath I used green burlap, wrapping in overlapping motion to make sure that the spacing is somewhat equal. I glued the beginning of the strip and went around making sure that it's very tight until very end and glued the end. If you have dealt with burlap, you will know that it's pain in the rear because it's a very sparse material. Do your best. Place the glue on the wreath and burlap on top while holding it down with scissors or the glue gun. DO NOT try to hold it down with hands - you will get burned. (Take it from someone who says 'ouch' a lot). Next the flowers.


For the flowers, I followed the Felt Anemone Tutorial at Something Turquoise blog and was so pleased with the result. Their simple and cute idea was just what I needed for this wreath. I didn't want to go any other route once I saw how beautiful these flowers are. Take your time with the first one and then you can speed through with the rest.

Materials:
2 sheets of pink felt (1.5"x 2" pieces)
5 strips of grey felt (1' wide)
5 fuzzy poms
hot glue gun
glue sticks

***1 sheet of pink felt makes 3 flowers, I used 4 petals for the top row and 6 petals for the bottom


And done! Make sure to save the link or PIN one of the images to your PINTEREST board for future references. You know, when the snow actually melts and you want it to look like spring!
Thank you for stopping by and I hope I got your creative juices flowing.

xo, Anna 

February 24, 2015

Bathroom Make Over


BEFORE:

AFTER:


I started my bathroom make over back in September as part of 30 day challenge. Needless to say, I have failed that challenge miserably. Although I did finish everything before Christmas, I didn't bother to report on it. For that I'm so sorry! 
Anyway, here is the quick and cheap remodel that consisted mostly of repainting everything in sight - from ceiling to the bathroom cabinets. We also added shelves and changed all the hardware. I planned on spending about $300 on this make over but ended up with over $500 hole in budget. It seems that much wasn't needed but when you start adding those small items together, it catches up to ya. I hope you can see how dramatic of a change is here and how much better it looks now! 
Thank you for stopping over! 
xo, Anna


BLOG DESIGN BY BELLA LULU INK